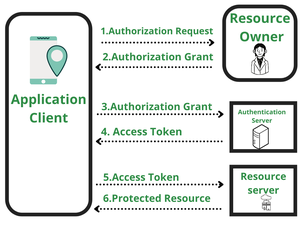
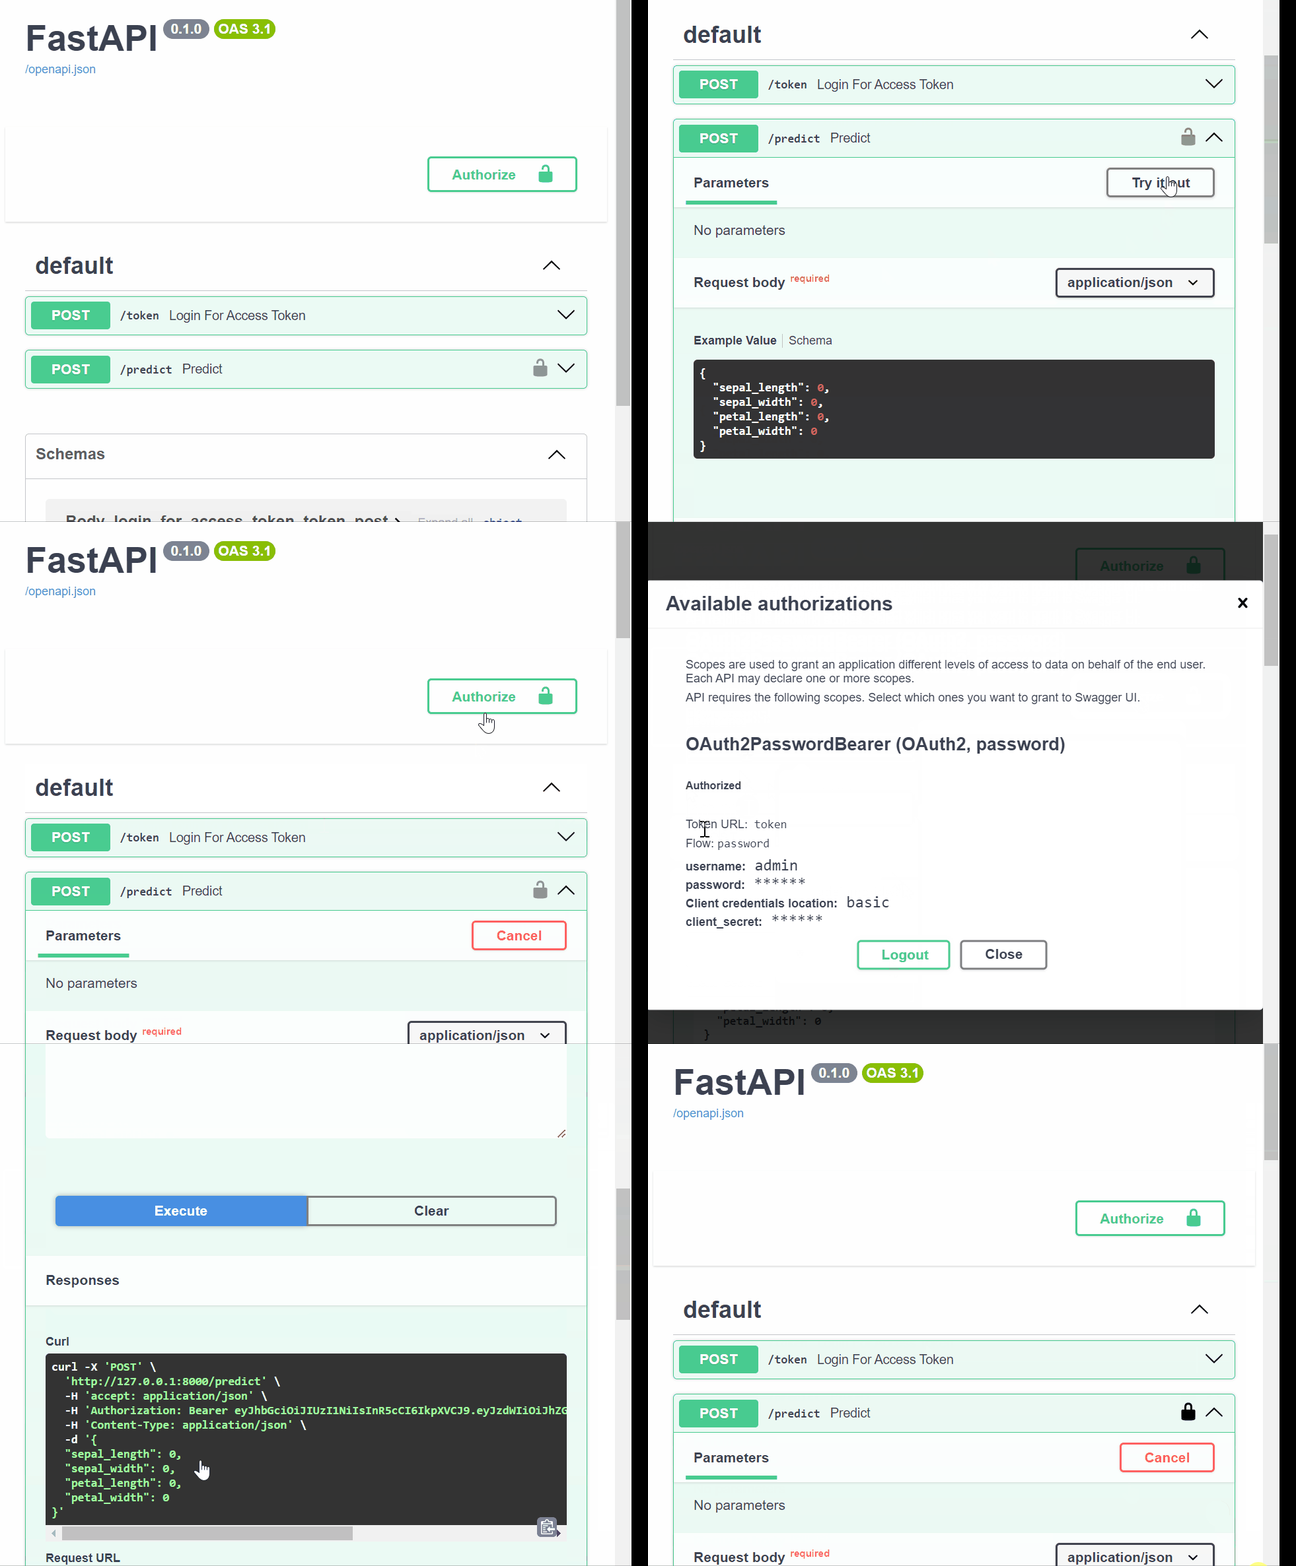
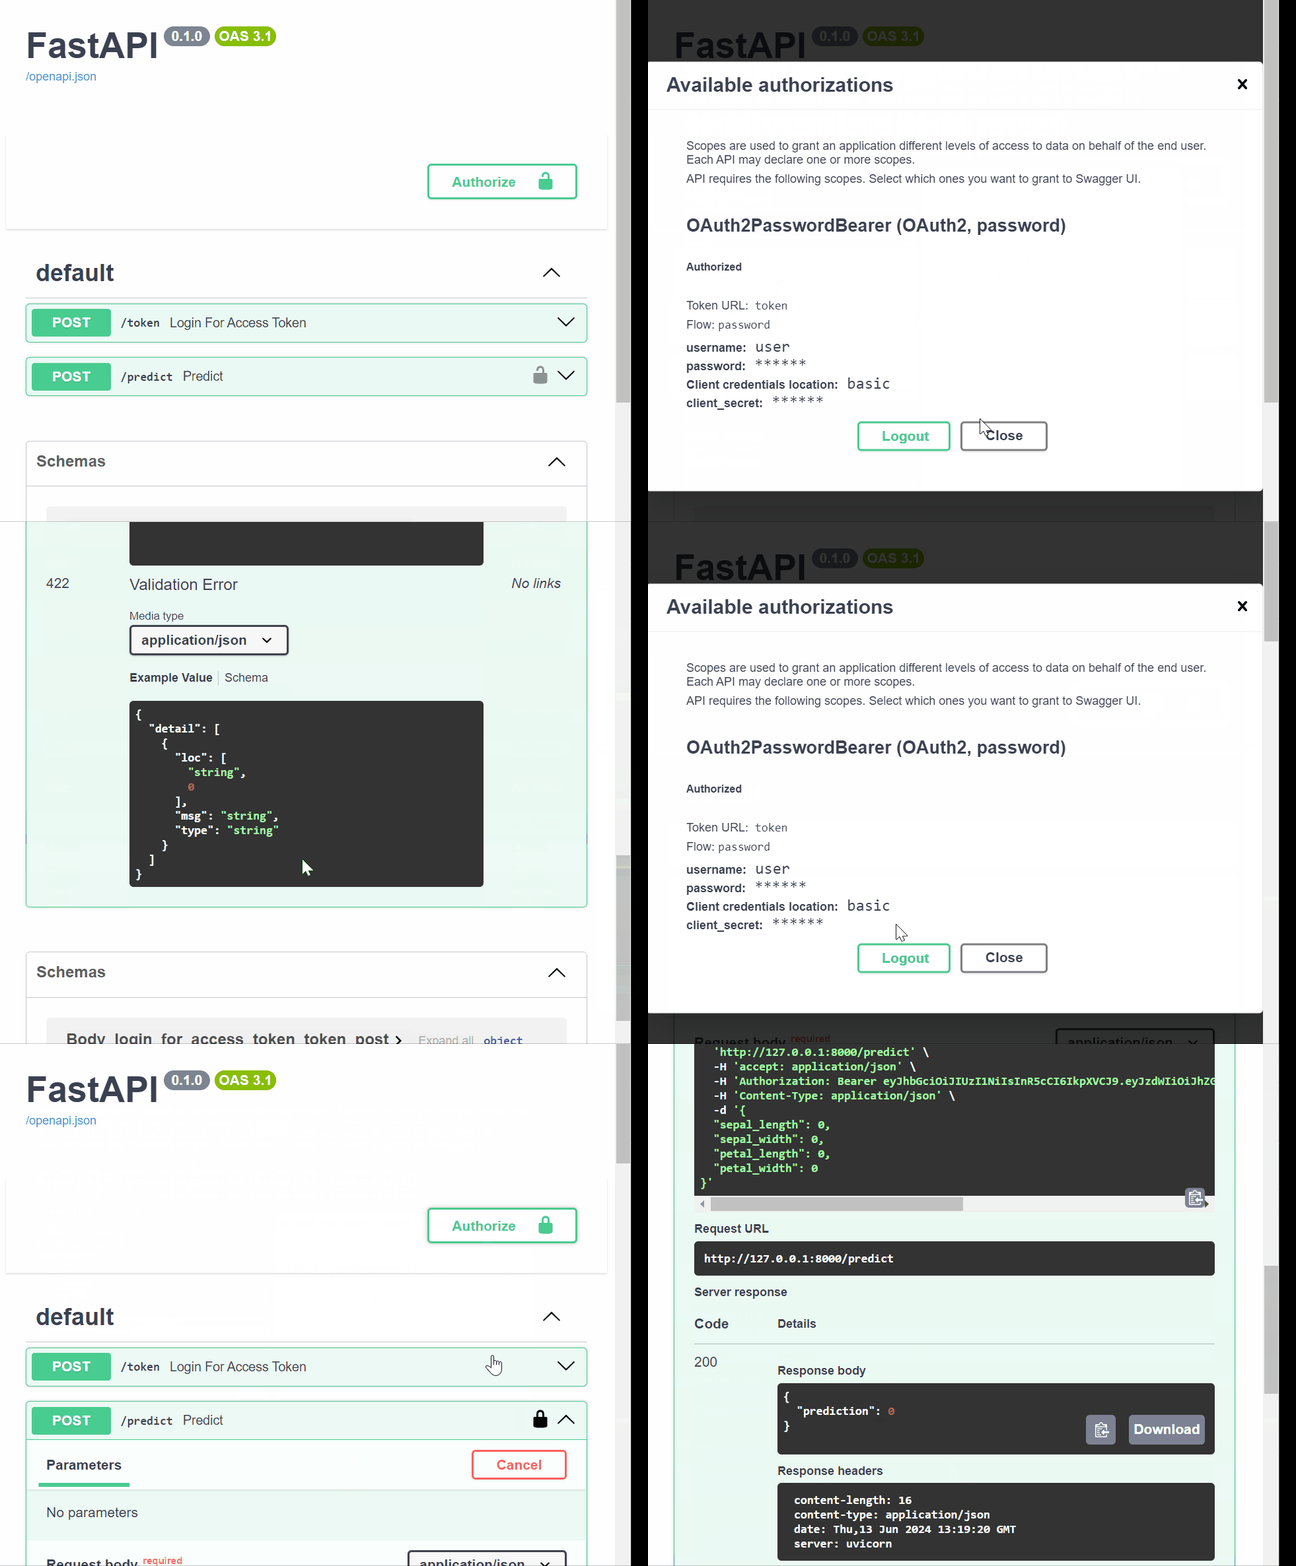
.png)
The end goal of a machine learning model is to serve end users. Still, due to machine learning models requiring regular updates to improve model accuracy and use in other applications, they are exposed as an API. An ML API is an application that serves as a gateway between your client requests or needs and your machine learning model.
Let’s say you have a recommender model on an e-library platform, that recommends books for users based on user preferences. This recommender model works as an API by getting user preferences and recommending books to the user. The API also makes it easy for you to use the recommender model on another platform.
Due to the sensitivity of training data in machine learning models, API security is important to avoid data breaches and prevent malicious clients from accessing the model. In this article, I will show you how to secure your machine-learning APIs using FastAPI - an open-source Python framework that allows you to build secured and scalable APIs. As a Python library, the learning curve is low for data scientists and machine learning engineers with Python backgrounds. If you are new to FastAPI check out this course on ML deployment with FastAPI.

Fundamentals of API Security
API is usually a target for data breaches and unauthorized access due to the information it contains, making it prone to security attacks, this is why API security is important. API security is a practice set to protect an API from unauthorized access. Here are some of the most common API security threats:
- Injection attacks (SQL, command): In this type of attack, someone injects malicious code into the API, using SQL or terminal commands to read or modify the database. These kinds of attacks are usually targeted at the application’s database.
- Cross-site scripting (XSS): This is another type of attack where a hacker manipulates a vulnerable site by sending malicious JavaScript to users, which upon execution by a user, the attacker can masquerade as the user and manipulate the user’s data.
- Cross-site request forgery (CSRF): In this attack, attackers make users perform actions they don’t intend to do.
- Man-in-the-middle (MITM) attacks: In this attack, hackers eavesdrop between the interaction of clients and the API, to steal relevant credentials such as login details and credit card information.
In this article, you will learn how to solve these issues and make your machine-learning API secure.
Prerequisites
Setting Up FastAPI for ML APIs
Create a project folder and a virtual environment.
Copy and paste the following code into a new file called
utilis.pyin your project directory. This will create a classification model and amodel.pklfile based on theirisdataset.from sklearn.datasets import load_iris from sklearn.ensemble import RandomForestClassifier import joblib # Load the iris dataset iris = load_iris() X, y = iris.data, iris.target # Train a random forest classifier model = RandomForestClassifier() model.fit(X, y) # Save the trained model joblib.dump(model, 'model.pkl')Create an API endpoint for the machine-learning model in a file
main.py.from fastapi import FastAPI from pydantic import BaseModel import joblib # Load the trained model model = joblib.load("model.pkl") # Define the request body using Pydantic class PredictionRequest(BaseModel): sepal_length: float sepal_width: float petal_length: float petal_width: float app = FastAPI() @app.post("/predict") def predict(request: PredictionRequest): # Convert request data to a format suitable for the model data = [ [ request.sepal_length, request.sepal_width, request.petal_length, request.petal_width, ] ] # Make a prediction prediction = model.predict(data) # Return the prediction as a response return {"prediction": int(prediction[0])} # To run the app, use the command: uvicorn script_name:app --reload # where `script_name` is the name of your Python file (without the .py extension)
We now have our ML model API, let’s see how we can implement security best practices using this API.
Input Validation and Sanitization
Input validation involves checking all inputs in an API to ensure that they meet certain requirements, while sanitization is input modification to ensure validity. Validation checks involve checking for allowed characters, length, format, and range, at the same time, sanitization is the changing of the input to ensure it is valid, such as shortening an input, or the removal of HTML tags in an input.
Input validation and sanitization help to prevent common attacks like SQL injection and Cross-site scripting, most times you use input validation when your user is to give a particular input type, for example, a mobile number which is all digits. Sanitization is used when the user is expected to provide varying input types such as a user’s profile.
Using Pydantic for Input Validation
pydantic is a Python library that allows you to define and validate user inputs. It makes it easy to perform schema validation and serialization using type annotations. Earlier on, we used Pyndantic to validate our User and PredictionRequest.
class PredictionRequest(BaseModel):
    sepal_length: float
    sepal_width: float
    petal_length: float
    petal_width: float

class User(BaseModel):
    username: str
    password: str
    role: str
Securing Data Transmission
When exchanging data between systems, it’s important to use data transmission protocols to secure and protect the data from unauthorized access. Data transmission security ensures that only authorized users can transmit data, and protect the system from vulnerabilities. There are various protocols one can force to keep data transmission secured such as HTTPS(Hypertext Transfer Protocol Secure), TLS(Transport Layer Security), SSH(Secure Shell), and FTPS(File Transfer Protocol Secure), we will only talk about HTTPS.
Enforcing HTTPS
HTTPS is a secured version of HTTP, where the data is encrypted when data is exchanged between a client and an API. Especially, when confidential details are shared such as user login credentials or account details. Unlike HTTP which has no security layer and makes data vulnerable, HTTPS adds an SSL/TLS layer to ensure that data is encrypted and secured.

To secure data in the API endpoint we created earlier, let’s generate a self-signed certificate for testing. Copy and paste the following code into your terminal.
openssl req -x509 -newkey rsa:4096 -keyout key.pem -out cert.pem -days 365 -nodesThis will generate a self-signed SSL/TLS certificate with a private key using OpenSSL.
openssl: This is the command-line tool for using the various cryptography functions of OpenSSL’s library.req: This sub-command is used to create and process certificate requests (CSRs) and, in this case, to create a self-signed certificate.x509: This option is used to generate a self-signed certificate instead of a certificate request.newkey rsa:4096: This option does two things:newkey: It generates a new private key along with the certificate.rsa:4096: This specifies the type of key to create, in this case, an RSA key with a size of 4096 bits.
keyout key.pem: This specifies the file where the newly generated private key will be saved (key.pem).out cert.pem: This specifies the file where the self-signed certificate will be saved (cert.pem).days 365: This sets the certificate to be valid for 365 days (1 year).nodes: This option ensures that the private key will not be encrypted with a passphrase. Without this option, OpenSSL would prompt for a passphrase to encrypt the private key.
Provide the necessary information to create the
key.pem(private key) andcert.pem(certificate).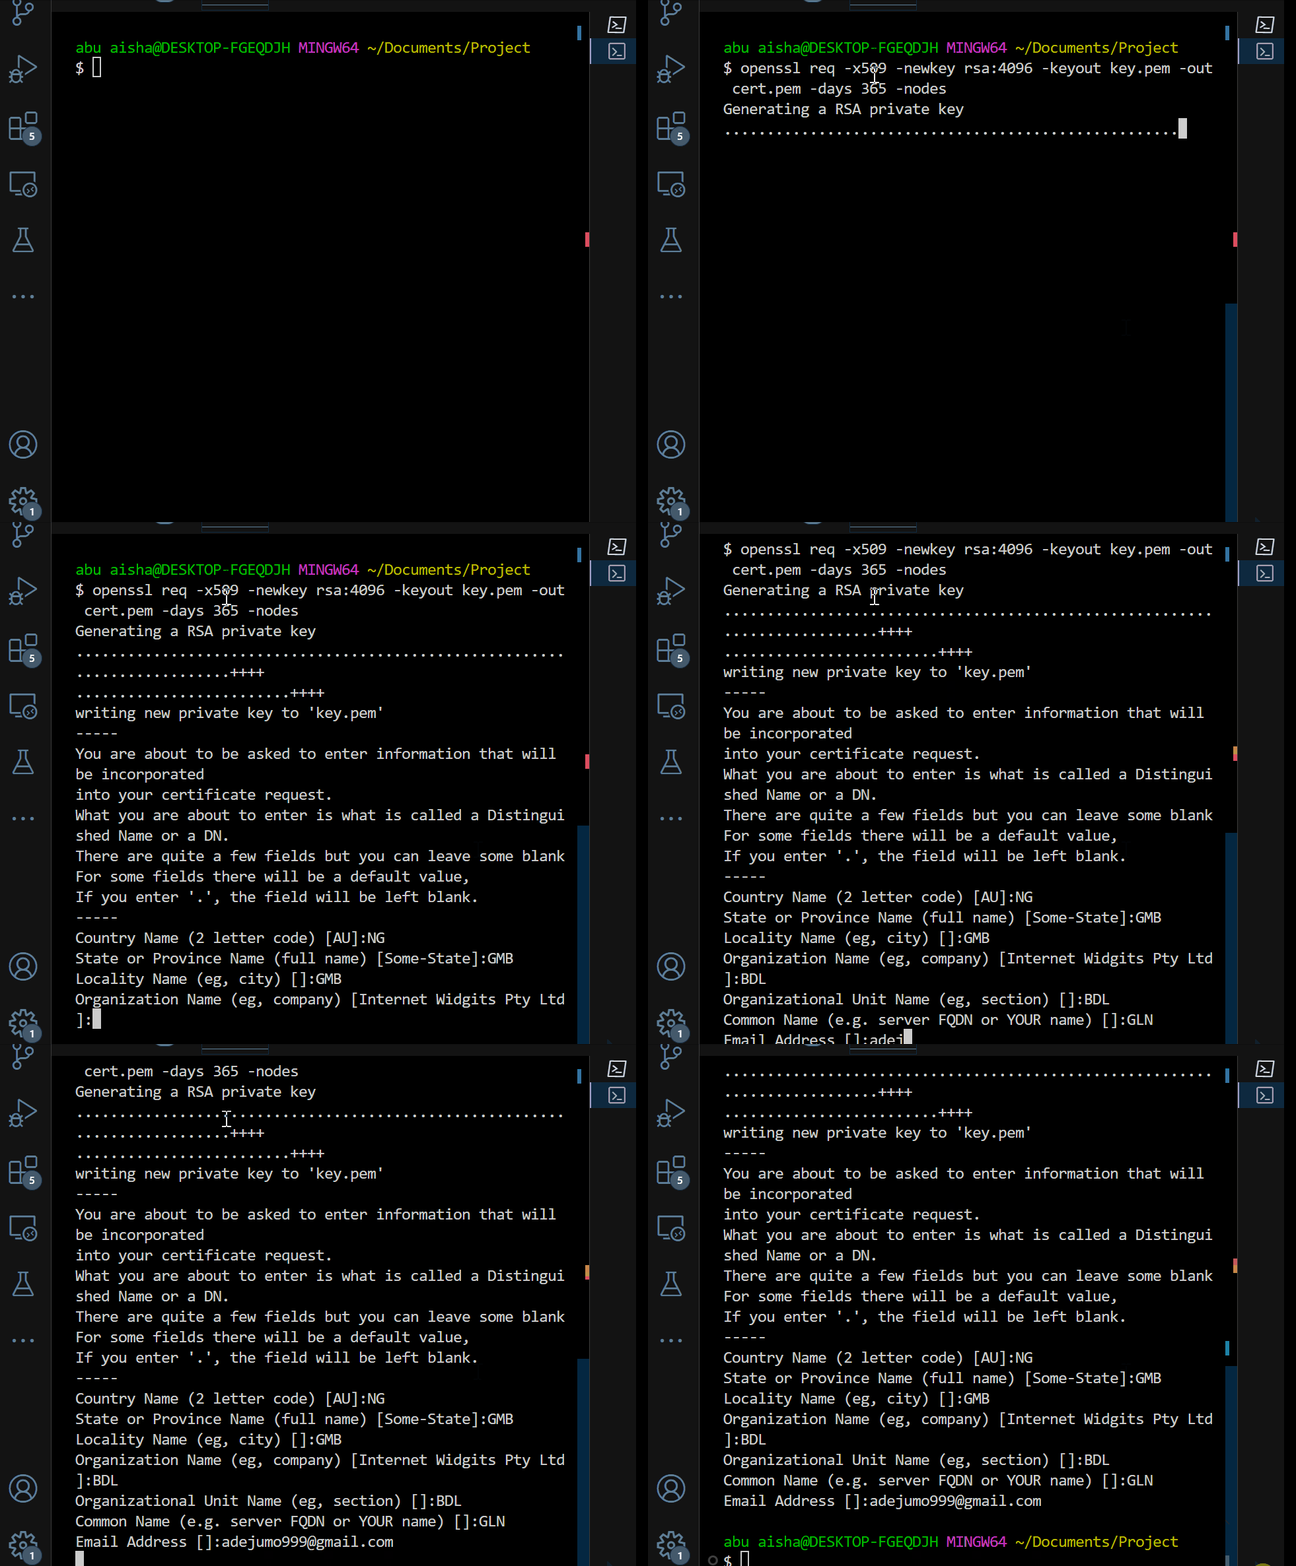
Generating a self-signed certificate using OpenSSL. Generating a self-signed certificate using OpenSSL.
At the end of the
main.pyfile, add the following code.import uvicorn if __name__ == "__main__": uvicorn.run( app, host="127.0.0.1", port=8000, ssl_keyfile="key.pem", ssl_certfile="cert.pem" )uvicorn.runensures your application runs on HTTPS using the generatedkey.pemandcert.pem.You can now run the API using the following code on your terminal
python main.py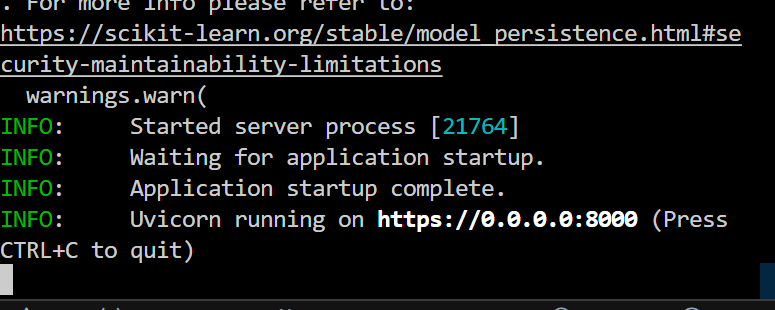
URL to the Model API displayed on terminal In a production environment, it is recommended to use a reverse proxy server like Nginx to handle SSL termination and forwarded requests to the FastAPI application, to ensure better performance and security.
Encrypting Sensitive Data
Encryption is simply the encoding of sensitive information, such that even if the information were to leak, the content is secured and remains unknown, upon reaching its target destination the data is decoded. This is very useful in protecting sensitive data such as passwords, and only authorized users can decrypt the information using a decryption key. Here is a simple example of how encryption works.
Import all necessary libraries and create an instance of the FastAPI class.
from fastapi import FastAPI, HTTPException, Depends
from pydantic import BaseModel
from cryptography.fernet import Fernet

app = FastAPI()
Next is to generate
keyfor encryption and decryption using theFernetclass.# Generate a key for encryption and decryption key = Fernet.generate_key() cipher_suite = Fernet(key)Create an
Itemmodel for receiving a text, and theEncryptedItemmodel for receiving the encrypted text.# Models class Item(BaseModel): plaintext: str class EncryptedItem(BaseModel): ciphertext: strCreate the encryption endpoint.
@app.post("/encrypt/", response_model=EncryptedItem)
async def encrypt_item(item: Item):
    plaintext = item.plaintext.encode("utf-8")
    ciphertext = cipher_suite.encrypt(plaintext)
    return {"ciphertext": ciphertext.decode("utf-8")}
This takes the given
itemand encodes it toutf-8, thecipher_suitekey encrypts theplaintexttociphertextwhich is a string of gibberish characters.Create the decryption endpoint that decrypts the gibberish characters to the plaintext.
# Decryption endpoint
@app.post("/decrypt/", response_model=Item)
async def decrypt_item(encrypted_item: EncryptedItem):
    ciphertext = encrypted_item.ciphertext.encode("utf-8")
    try:
        plaintext = cipher_suite.decrypt(ciphertext)
        return {"plaintext": plaintext.decode("utf-8")}
    except Exception as e:
        raise HTTPException(status_code=400, detail="Decryption failed")
This endpoint takes the
encrypted_itemand encodes it toutf-8before decrypting it toplaintextusing thecipher_suitefunction. If the wrongciphertextis provided, a400status code is returned with the detail"Decryption failed".
Encrypting sensitive data in FastAPI
Rate Limiting and Throttling
Another way of securing APIs is by limiting the number of API calls made to the server. This is where rate limiting and throttling comes into play. Rate limiting is a technique of controlling the amount of incoming and outgoing traffic to or from a network, to prevent abuse and overloading of the server. While throttling on the other hand is temporarily slowing down the rate at which the API processes requests. To apply rate limiting and throttling to our previous example.
Ensure you have installed the
slowapilibrary, a library for implementing rate-limiting and throttling to APIs, and add the following new imports.from slowapi import Limiter, _rate_limit_exceeded_handler from slowapi.util import get_remote_address from slowapi.errors import RateLimitExceededNext is to initialize the rate limiter.
limiter = Limiter(key_func=get_remote_address)
app = FastAPI()
app.state.limiter = limiter
app.add_exception_handler(RateLimitExceeded, _rate_limit_exceeded_handler)
Apply the rate limiter to the
/token/endpoint using@limiter.limit("5/minute")decorator, and therequest: Requestparameter in thelogin_for_access_tokenfunction.@app.post("/token") @limiter.limit("5/minute") async def login_for_access_token(request: Request, form_data: OAuth2PasswordRequestForm = Depends()):Also, apply a 10-minute rate limiting to the
/predictendpoint. Change the parameter name in thepredictfunction fromrequesttoprediction_requestto avoid confusion with the newrequest: Requestparameter.@app.post("/predict") @limiter.limit("10/minute") async def predict( request: Request, prediction_request: PredictionRequest, token: str = Depends(oauth2_scheme), current_user: User = Depends(role_checker("admin"))
Conclusion
You can combine all these methods in your ML Model API to ensure maximum security as much as possible. In this article, you have learned how to implement various API security techniques in your FastAPI model such as authentication, authorization, input validation, sanitization, encryption, rate limiting, and throttling. If you want to dive deep into model deployment with FastAPI, here are some extra resources to keep you busy.
- ML Model Deployment with FastAPI and Streamlit
- How to Build an Image Classifier Application on Vultr Using FastAPI and HuggingFace
- How to Build a WhatsApp Image Generator Chatbot with DALL-E, Vonage and FastAPI
- Build an SMS Spam Classifier Serverless Database with FaunaDB and FastAPI
- Implementing Rate Limits in FastAPI: A Step-by-Step Guide
- Implementing Logging in FastAPI Applications
- ML - Deploy Machine Learning Models Using FastAPI
- Deploying and Hosting a Machine Learning Model with FastAPI and Heroku
Need Help with Data? Let’s Make It Simple.
At LearnData.xyz, we’re here to help you solve tough data challenges and make sense of your numbers. Whether you need custom data science solutions or hands-on training to upskill your team, we’ve got your back.
📧 Shoot us an email at admin@learndata.xyz—let’s chat about how we can help you make smarter decisions with your data.


